Skip to content
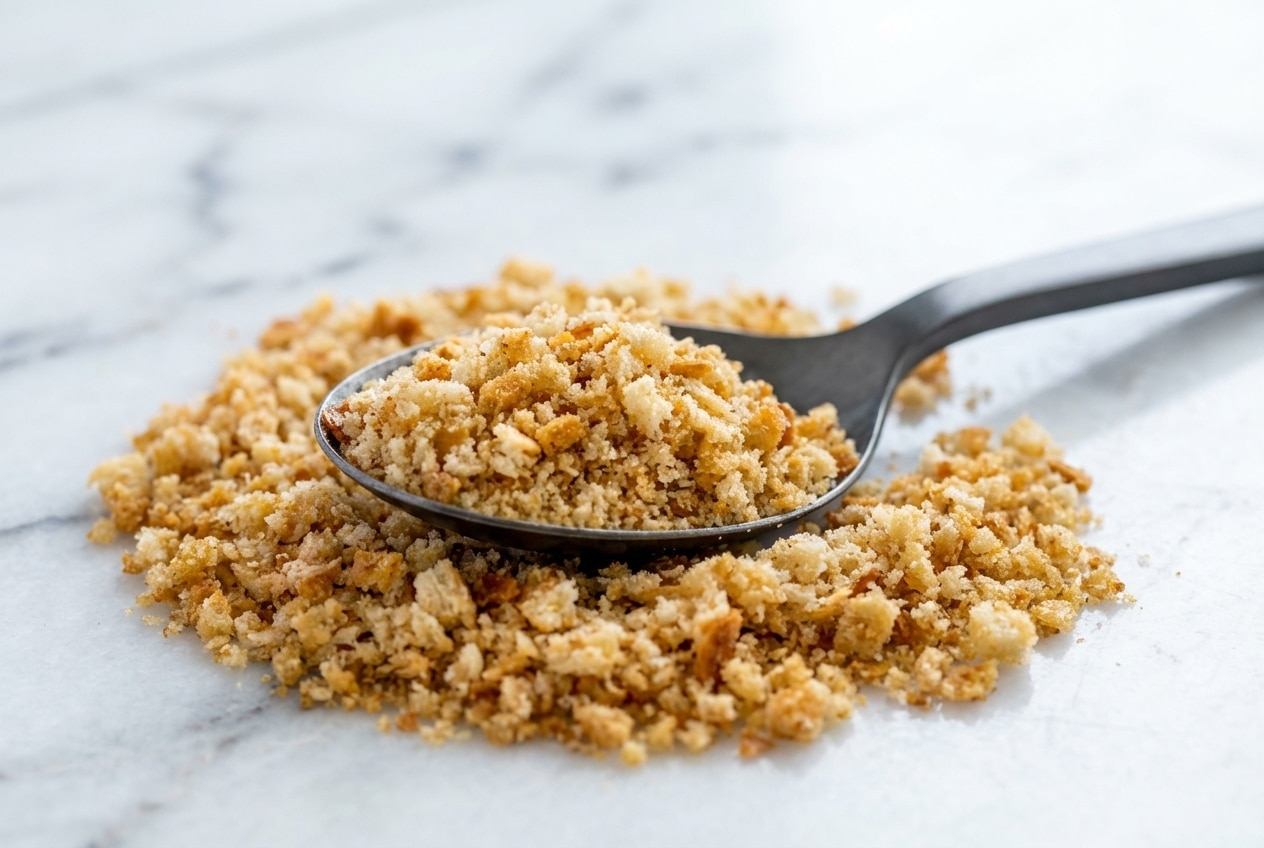
In my kitchen, breadcrumbs are the quiet hero that decides whether mac and cheese wears a crackly crown or just a soft blanket. The same goes for Sunday meatballs, a good crumb holds everything together without turning dense.
Store-bought gets the job done, sure, but it rarely has that toasty perfume and real crunch you want. This guide walks you through homemade breadcrumbs with a savory twist, so the texture stays crisp and the flavor tastes like you meant it.
Why You’ll Love This Recipe
The Savory Twist: In my tests, browned butter and miso powder turn basic crumbs into something you snack on straight off the pan, nutty, salty, and deeply savory in a way plain salt cannot touch.
Umami Meets Toasted Aroma: The miso gives a rounded, savory backbone, and the browned butter brings that warm, hazelnut-like fragrance that makes the whole kitchen smell like comfort.
Crunch That Lasts: Butter coats the crumbs so heat conducts evenly, and they resist steam longer, which means less sogginess on casseroles and better browning when you chase the Maillard reaction.
Ingredients and Substitutions

All you need is bread plus a simple Italian-style seasoning blend. The method is what makes these breadcrumbs special, especially the final toast that locks in a deep, golden crunch.
Ingredients
- 4 ounces bread, (4 cups cubed) cut into 1-inch cubes
Italian bread crumbs:
- 1 cup baked and cooled breadcrumbs
- ½ teaspoon kosher salt
- ⅛ teaspoon garlic powder
- ⅛ teaspoon onion powder
- ½ teaspoon Italian seasoning
Ingredient Notes & Substitutions
Stale bread: Bread that’s a bit dry (even just day-old) pulses cleaner in a Food processor and bakes up crisper, because you’re starting with less moisture to drive off.
Sourdough: Sourdough makes breadcrumbs with a deeper flavor and a gentle tang, which I love for baked mac and cheese or any cheesy casserole that needs a bright edge.
Panko-style crumbs: White bread with the crusts removed gives a paler, flakier crumb, and keeping the pulses short helps you avoid turning the bottom into powder.
Baking sheet and Parchment paper: A Baking sheet lined with Parchment paper keeps the crumbs from sticking and makes it easy to stir and rotate for even browning.
Gluten-free breads: Grain-free or gluten-free loaves can work, but watch them closely in the final minutes, they often brown faster once fully dry.
Brown butter and miso powder: This is the whole “savory twist” moment, a small drizzle and a light sift are enough to perfume every crumb without making them greasy.
How to Make breadcrumbs
Prep the Oven and Build the Crumb
- Set your oven rack in the center position, then preheat to 300ºF (149ºC). I like this lower heat because it dries first, then browns, instead of scorching the edges.
- Add the 1-inch bread cubes to a food processor. Pulse in small batches if needed, then run on high speed for 30 seconds for coarse crumbs or 1 minute for fine, stopping once the pieces look sandy and even.
Dry and Lightly Toast
- Spread the crumbs onto a large sheet pan, or two smaller pans, in a single layer so steam can escape. The thinner the layer, the more evenly the crumbs dry.
- Bake for 5 minutes, stir well to lift the damp spots, then bake another 5 minutes. You’re looking for a light tan color and a dry feel when you rub a pinch between your fingers.
The Umami Infusion and Final Toast
- Give them another 2 to 5 minutes in the oven, just until they’re completely dry. When they’re ready, they’ll smell toasty and feel crisp, not soft in the center.
- Now for the twist, drizzle 1 to 2 tablespoons browned butter over the warm crumbs and sift 1 teaspoon miso powder across the top, then toss until every bit looks lightly glossed. Return to the oven just long enough to deepen the gold and wake up that nutty aroma.
Cool, Store, and Refine the Texture
- Let the breadcrumbs cool on the sheet pan for 10 to 15 minutes, so escaping heat does not trap moisture. They should feel dry and crisp all the way through.
- Transfer to an airtight container for storage, and if you want them finer, pulse briefly in the food processor until the size feels right for your dish.
Secrets for Ultimate Texture and Flavor

The magic is browning plus dryness, that’s what gives breadcrumbs their staying power. The Maillard reaction is what creates those roasted, savory notes, and miso powder quietly boosts that effect with extra depth.
Breadcrumbs can also thicken soups and sauces without turning pasty. The science behind thickening for soups and sauces explains how starch sets as it heats.
For thickening, I stick to a 1:4 ratio of breadcrumbs to liquid. This is especially cozy stirred into a protein tomato soup, where you want body without gumminess.
If you want a quick batch, an air-fryer works beautifully for small amounts. Set it to 300ºF and cook 5 to 8 minutes, shaking halfway, until the crumbs feel dry and smell toasted.
Butter matters more than people think, because fat coats the particles and slows how quickly they drink in steam. That’s why a browned-butter finish keeps a topping crisp longer on hot casseroles.
Pro Tips & Troubleshooting
Pro Tips
- Pulse in small bursts so the crumbs stay even, the Food processor can turn the bottom into dust fast.
- Use a coarse sieve to separate fine dust from larger crunchy bits, then bake the bigger bits a touch longer for pro-level texture.
- If your bread is fresh, pre-toast it gently at low heat first, driving off moisture before processing.
- Add Pecorino Romano or lemon zest only after the crumbs have cooled, so they stay crisp and aromatic.
Common Mistakes to Avoid
- Processing bread while it’s warm, it releases steam and clumps into gummy bits.
- Using breads with seeds or nuts, which can brown unevenly and turn rancid in storage.
- Storing crumbs before they are 100 percent cool, condensation invites mold fast.
- Over-processing into flour-fine dust, you lose the crunch that makes toppings exciting.
Moisture control is the whole game, so I treat storage like a finishing step. Good dry storage in an Airtight container helps prevent humidity and off flavors.
Serving & Storage Guide

Creative Serving Ideas
For pasta nights, I love a pangrattato-style shower of crumbs with lemon and herbs. That bright finish is especially good on roasted vegetables, including roasted cabbage steaks, where umami loves all that caramelized edge.
These breadcrumbs are also a natural binder for meatballs or crab cakes, they hold moisture without making the mix heavy. They shine as a crunchy topping on mac and cheese, baked ziti, and any vegetable gratin begging for contrast.
For seafood, the browned-butter flavor reads almost like a built-in sauce. They make a gorgeous crust on parmesan crusted cod, especially when you want crunch without deep frying.
Storage and Re-Crisping Instructions
Store in an Airtight container at room temperature for 2 weeks, or freeze for 3 months. Seasoned crumbs keep best when they’re fully dry before you seal them up.
Frozen breadcrumbs can come back to life fast. Toss them in a dry pan over medium heat for 2 minutes, stirring until they smell toasty and feel crisp again.

Savory Browned Butter And Miso Breadcrumbs
Equipment
- Food Processor
- Baking sheet
- Parchment paper
Ingredients
- 4 ounces bread, (4 cups cubed) cut into 1-inch cubes
Italian bread crumbs
- 1 cup baked and cooled breadcrumbs
- 0.5 teaspoon kosher salt
- 0.125 teaspoon garlic powder
- 0.125 teaspoon onion powder
- 0.5 teaspoon Italian seasoning
Instructions
Prep the Oven and Build the Crumb
- Position your oven rack in the center and preheat the oven to 300 degrees Fahrenheit (149 degrees Celsius). This lower temperature allows the bread to dry completely before browning.
- Place the 1-inch bread cubes into a food processor. Pulse in small batches if necessary, then run on high for 30 seconds for a coarse texture or 1 minute for a fine, sandy consistency.
Dry and Lightly Toast
- Spread the processed crumbs onto a large baking sheet in a thin, single layer to ensure even drying and to allow steam to escape.
- Bake for 5 minutes, then stir the crumbs thoroughly to shift any damp spots. Bake for another 5 minutes until they achieve a light tan color and feel dry between your fingers.
The Umami Infusion and Final Toast
- Continue baking for an additional 2 to 5 minutes until the crumbs are completely dry, crisp, and emit a toasted aroma.
- Drizzle 1 to 2 tablespoons of browned butter over the warm crumbs and sift 1 teaspoon of miso powder on top. Toss until the crumbs are lightly glossed.
- Return the pan to the oven for a final minute or two to deepen the golden color and wake up the nutty fragrance of the butter and miso.
Cool, Store, and Refine the Texture
- Let the breadcrumbs cool completely on the baking sheet for 10 to 15 minutes. This step is crucial to prevent trapped moisture from making them soggy.
- Transfer the finished crumbs to an airtight container. If you prefer a finer texture, pulse them briefly in the food processor one last time before storing.
Notes
Nutrition
Conclusion
Once you taste homemade breadcrumbs with that browned-butter, miso-savory twist, the store-bought kind feels oddly flat. Keep the oven gentle, chase dryness before deep color, and you’ll get that golden crunch that stays put.
Play with different breads, especially Sourdough, and make the texture your own. A small jar of these in the pantry has a way of turning weeknight food into something you’re proud to set on the table.
Frequently Asked Questions
What is the difference between fresh, dried, and Panko breadcrumbs?
Fresh crumbs are softer and hold more moisture, great for binding but not for crisp toppings. Dried breadcrumbs are baked until dry and toast beautifully. Panko-style crumbs are larger and flakier, usually made from crustless white bread, so they fry and bake up extra airy.
How long can homemade breadcrumbs be stored at room temperature?
In an Airtight container, they keep at room temperature for 2 weeks. If your kitchen runs humid, freezing for up to 3 months is the safer, crisper bet.
Can you make breadcrumbs out of fresh bread without waiting for it to go stale?
Yes, just dry it first, then process and bake as written at 300ºF (149ºC). Fresh bread carries more moisture, so the drying stages matter even more for avoiding gummy crumbs.
What are the best seasonings to add to basic breadcrumbs?
Kosher salt, garlic powder, onion powder, and Italian seasoning give a classic “red-sauce” vibe. For a sweet-heat contrast on chicken or roasted vegetables, a drizzle paired with a hot honey recipe tastes modern and punchy.
How do I make gluten-free breadcrumbs that actually stay crispy?
Start with a gluten-free loaf that’s already a bit dry, then bake until completely dry before storing. A quick re-crisp in a dry skillet for 2 minutes brings back the crunch if they soften.