Skip to content
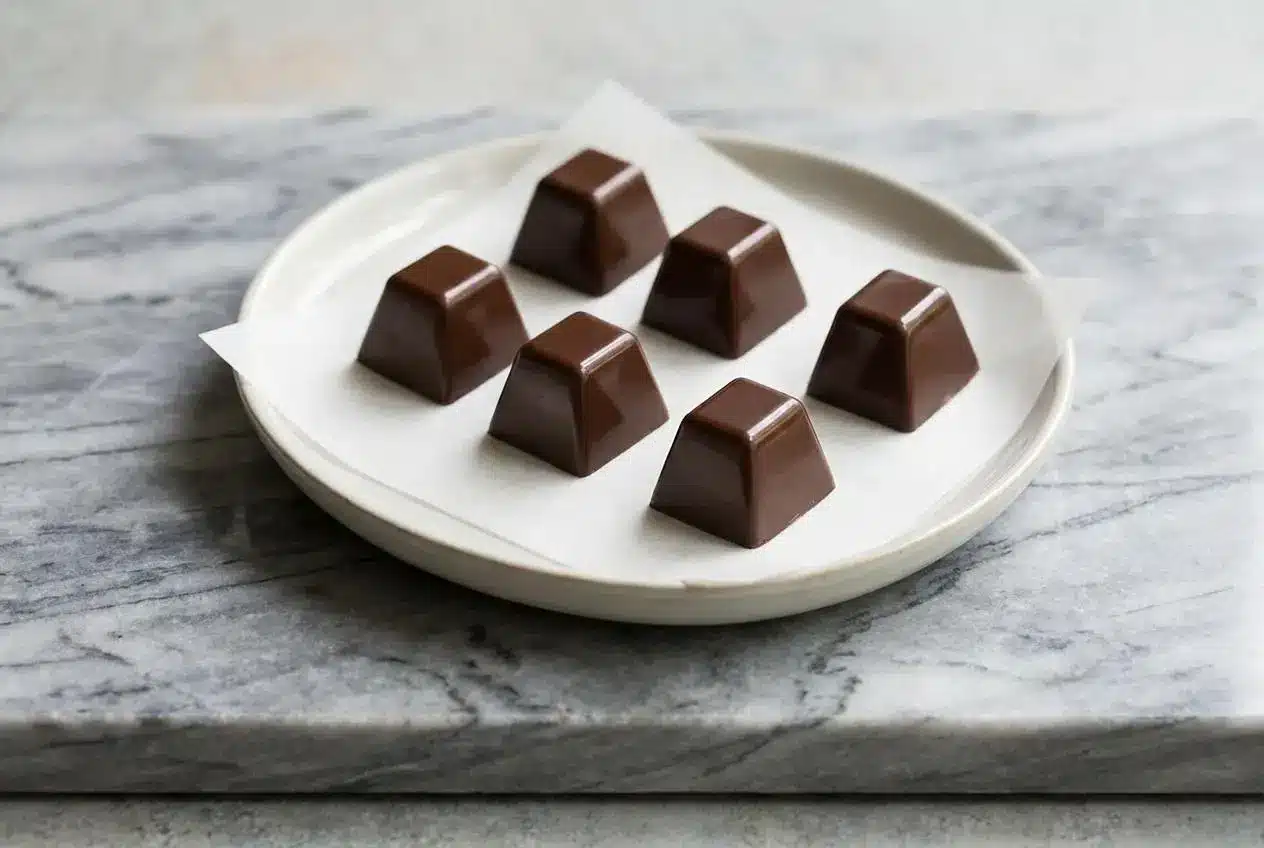
There’s something about opening the fridge, pulling out chocolate, and making a glossy little candy that feels like you’ve hired a chocolatier for the night. That is exactly why I love sharing simple Chocolate Candy Recipes that actually deliver a real “gourmet” finish at home.
This easy homemade chocolate candy method is beginner-friendly, no fussy equipment required, and it’s built for that satisfying snap when you bite in. In my kitchen, this is the go-to when I want edible gifts, holiday candy, or a “just because” treat without the stress.
Why You’ll Love This Chocolate Candy Recipe
Professional Gloss & Snap: Instead of just melting chocolate, I use a simplified seed tempering approach so the shell sets with a shiny, satiny look and a clean crunch.
The Secret Twist: I melt 2/3 of the chopped chocolate, take it off the microwave, then stir in the remaining 1/3 of finely chopped chocolate until everything turns smooth and glossy. It is an accessible way to temper without special equipment, and it makes the difference between soft chocolate and true chocolate candy.
Stable at Room Temperature: Properly tempered chocolate holds its structure, so you can serve these chocolate bonbons without them turning tacky right away.
Fully Customizable: Once you get the shell down, I treat the filling like a playground, from caramel filling to peanut butter cups inspired combos and thick ganache.
Ingredients and Substitutions

These are the simple building blocks for homemade candy with a crisp shell and a filling that suits your mood. Chocolate does the heavy lifting for flavor and structure, while your filling brings the personality.
Ingredients
- 2 cups Melted chocolate Semisweet, dark, milk or even white
- 2 cups Fillings Such as nuts, Nutella, peanut butter, jams, preserves, fresh berries, marshmallows, marshmallow creme or fluff, caramel sauce, crushed oreos, thick ganache
Ingredient Notes & Substitutions
Chocolate: I like good-quality chocolate bars or wafers that are made for melting, and if you can find it, choose varieties labeled as “couverture.” Chocolate chips can work in a pinch, but many are formulated to hold their shape for baking, so they temper less reliably.
Fillings: The best fillings are thick and spoonable, so they do not leak or make the shell go watery. If you want to use anything fruity or berry-based, keep it relatively concentrated and use a filling that is not overly wet to protect the texture of the chocolate shell.
Molds: Silicone molds are the easiest for clean demolding, but a clean, dry ice cube tray also does the job when you want classic chocolate squares. Whatever you use, make sure it is dry and free of residue so the tempered chocolate sets smoothly.
How to make Chocolate Candy Recipes
Prep and Melt with the Seed Temper Method
- Finely chop all 2 cups of chocolate so it melts evenly. I like the pieces small enough that they look consistent, then I set aside one-third, about 2/3 cup, in a separate bowl as the “seed” chocolate.
- Microwave the larger portion, which is two-thirds of the chocolate, in a microwave-safe bowl for 30-second intervals at 50% power. Between each interval, stir thoroughly until the chocolate turns fully liquid and looks smooth, glossy, and fluid, without any scorched smell.
- Temper the chocolate by removing the bowl from the microwave and immediately stirring in the reserved seed chocolate. Keep stirring continuously until the seed chocolate has fully melted and the mixture looks uniform, satin-smooth, and glossy, like melted chocolate that is suddenly ready to coat.
Build the Shells and Seal
- Paint a thick, even layer of the tempered chocolate inside each cavity of your silicone mold or ice cube tray. I use a small, clean paintbrush or the back of a spoon, and I look for full coverage with no gaps, because thin shells are the ones that crack.
- Chill for the first set, either in the freezer for 10 minutes or in the refrigerator for 20 minutes, until the shells feel firm to the touch. You are aiming for a set that does not smear when you gently press the edge.
- Spoon in your filling after chilling, leaving a little space at the top so the final chocolate layer can seal cleanly. Keep the filling level, and do not overfill, or it can push up and interfere with the seal.
- Pour the remaining tempered chocolate over the fillings and spread it smoothly to create a flat bottom. Then gently tap the mold on the counter to nudge out air bubbles, which helps the top set up with a neat finish.
Finish, Chill, and Demold
- Chill for the final set, returning the tray to the freezer for another 15-20 minutes, or refrigerate for 30-40 minutes. The candies should feel fully solid and lift without wobbling.
- Demold by flipping the mold onto a sheet of wax paper or parchment paper and gently flexing the mold. A light tap helps the chocolate bonbons release cleanly, and they should come out with a glossy, even shell.
The Secret to Perfect Homemade Chocolates

Tempering is temperature control, not just melting: When I temper chocolate, I am guiding the cocoa butter crystals to form the right structure as the candy cools. That is what gives you strength, shine, and that satisfying snap.
Untempered chocolate feels different: If you simply melt chocolate without tempering, the shell can set softer, look dull, and melt more easily on contact. It is still chocolate, but it does not have that crisp bite you expect from real chocolate candy.
Look for a satin finish: Properly tempered chocolate stays fluid while you work, then sets with a smooth, glossy surface instead of streaks or a cloudy look.
Choosing the Best Chocolate for Candy Making
Couverture versus compound chocolate: Couverture chocolate has more cocoa butter, so it melts smoothly and behaves beautifully for tempering. Compound chocolate, often sold as “candy melts,” melts more easily but usually has oils instead of cocoa butter, which means less depth of flavor and a different texture.
Can you use chocolate chips?: Most chocolate chips contain less cocoa butter and added emulsifiers to help them hold their shape in baking. They can be used in a pinch, but they often resist tempering, which can lead to a dull finish and weaker snap.
Dark, milk, or white: Dark chocolate is generally the most forgiving, while milk and white chocolate are more sensitive to heat. In my experience, that means gentle melting and quick tempering make a bigger difference with those varieties.
For readers who want to compare melting methods and textures, this guide on how to melt chocolate helps connect the dots between stovetop versus microwave approaches.
3 Easy Filling Recipes for Your Chocolates
Creamy Peanut Butter Filling
Mix creamy peanut butter with powdered sugar until thick and scoopable. If you want a crunchier bite, stir in a small handful of crispy rice cereal and keep mixing until everything holds together.
Quick Salted Caramel Filling
For a cheater caramel, melt store-bought soft caramel candies, then loosen with a splash of cream until it turns glossy. Add a pinch of flaky sea salt, and stir until the sauce becomes smooth enough to spoon.
If you want a homemade twist, a miso caramel recipe can bring a savory-sweet depth that feels gourmet, especially with dark chocolate shells.
No-Fuss Peppermint Cream
Stir powdered sugar with a tiny bit of softened butter or cream cheese to form a thick paste. Add a few drops of peppermint extract and mix until the filling smells like a classic holiday candy.
Pro Tips & Troubleshooting
Pro Tips for Success
- Use a paintbrush: A small, clean paintbrush helps you paint a thick, even chocolate shell that is less likely to crack.
- Work in short bursts: Microwave chocolate in 30-second intervals, stirring between each, to prevent burning or seizing.
- Enhance the flavor: I sometimes mix in a pinch of espresso powder to deepen dark chocolate, or I sprinkle flaky sea salt on top right before the final set.
- Keep everything dry: Any water that hits melting chocolate can cause it to seize, so bowls, spoons, spatulas, and fillings need to be completely dry.
Common Mistakes to Avoid
- Why did my chocolate get thick and grainy? (Seized Chocolate): This usually happens when chocolate overheats or touches water. Lower the microwave power, keep intervals short, and use dry tools, because once chocolate seizes it can be hard to save for shells, though it can sometimes be repurposed by stirring in more fat like oil or butter for a sauce or drizzle.
- Why are my candies dull or streaky? (Chocolate Bloom): A cloudy, streaky finish often means the chocolate was not properly tempered. Following the seed tempering method in this recipe is the best way to steer clear of bloom.
- Why did my chocolate shells crack?: Cracking is commonly caused by shells painted too thin. If the first layer looks translucent, apply a second coat after the initial chill so the candy has enough thickness to stay sturdy.
Serving & Storage

Serving & Gifting Ideas
For parties, I love plating an assortment of different fillings on a simple tray, so each bite feels like a surprise. It also makes the table look extra special without any complicated decorating.
For edible gifts, I package a mixed batch in a decorative box with small paper liners, which instantly turns homemade Chocolate Candy into a thoughtful holiday candy moment or a birthday thank-you. Colored sprinkles or a contrasting drizzle, like white chocolate over dark, are an easy way to theme them for Valentine’s Day or Christmas.
How to Store Homemade Chocolates
Tempered chocolates (this recipe) are shelf-stable and should be stored in an airtight container in a cool, dry place, like your pantry, for up to 2 weeks. I avoid the refrigerator because condensation can trigger sugar bloom and dull the surface.
If you use fresh, high-moisture fillings, refrigerate and plan to eat within 2-3 days. That helps maintain texture, since moisture and chocolate do not always play nicely together.

Easy Homemade Chocolate Candy Recipe

Equipment
- Microwave-safe bowl
- Silicone candy molds or ice cube tray
- Small paintbrush or spoon
- Spatula
Ingredients
- 2 cups Melted chocolate Semisweet, dark, milk or even white
- 2 cups Fillings Such as nuts, Nutella, peanut butter, jams, preserves, fresh berries, marshmallows, marshmallow creme or fluff, caramel sauce, crushed oreos, thick ganache
Instructions
Prep and Melt with the Seed Temper Method
- Finely chop all your chocolate. Set aside one-third (about 2/3 cup) in a separate bowl to use as the 'seed' chocolate.
- Place the larger portion of chocolate (the remaining two-thirds) in a microwave-safe bowl. Microwave at 50% power in 30-second intervals, stirring thoroughly after each interval, until the chocolate is completely melted, smooth, and glossy.
- Remove the bowl from the microwave and immediately add the reserved seed chocolate. Stir continuously until all the chocolate has melted and the mixture is uniform and satin-smooth.
Build the Shells and Seal
- Using a small paintbrush or the back of a spoon, paint a thick, even layer of the tempered chocolate inside each cavity of your silicone mold. Ensure there are no gaps.
- Chill the molds in the refrigerator for 20 minutes (or freezer for 10 minutes) until the shells are firm to the touch.
- Spoon your desired filling into the chilled chocolate shells, leaving a small amount of space at the top for sealing.
- Pour the remaining tempered chocolate over the fillings to cover them completely. Spread it smoothly to create a flat bottom and gently tap the mold on the counter to release any air bubbles.
Finish, Chill, and Demold
- Return the filled molds to the refrigerator for a final chill of 30-40 minutes (or freezer for 15-20 minutes), until the candies are completely solid.
- To demold, flip the mold over onto a sheet of parchment paper and gently flex it. The candies should release cleanly with a glossy finish.
Notes
Nutrition
Conclusion
Once you nail the simple seed tempering technique, you unlock truly gourmet tasting Chocolate Candy Recipes made right at home, with a glossy shell and that satisfying snap.
I always say the fun part is filling, so after your first batch, experiment with what you love, from caramel filling to peanut butter cup vibes, and enjoy the process.
Frequently Asked Questions
What kind of chocolate is best for making homemade candy?
Do I need to temper the chocolate for this recipe?
What are some easy filling ideas for a beginner?
How do I prevent my chocolate shells from cracking?
How should I store homemade chocolate candies and how long do they last?
Can I make this recipe without a special mold?