Skip to content
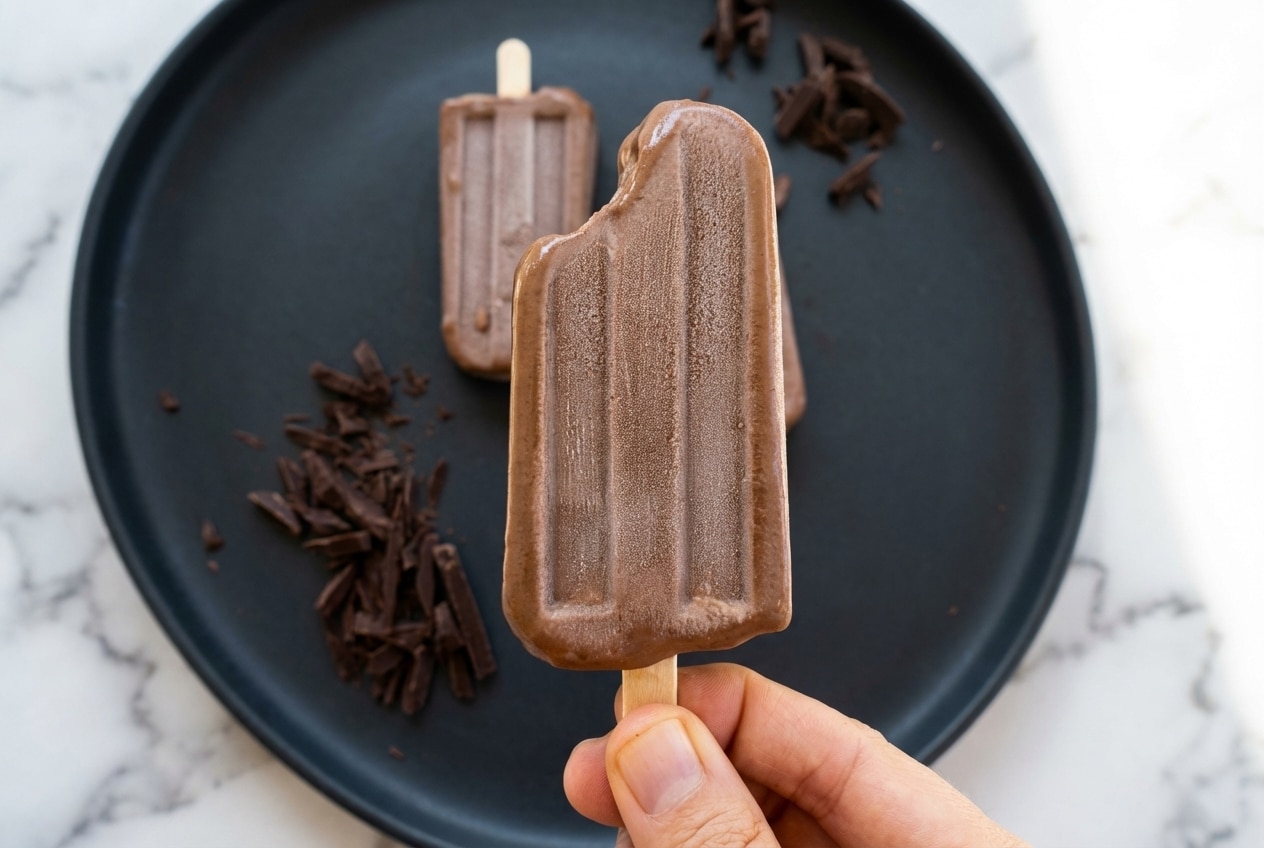
Every summer of my childhood had the same soundtrack, the distant jingle of the ice cream truck, and that sprint to the curb with sticky coins in my palm. Then you get older, you buy the store-bought kind, and it’s mostly ice and sugar with a faint “chocolate-ish” shrug.
These homemade fudge popsicles bring back the magic, but with grown-up, gelateria-level texture. In my kitchen, the goal is a pop that bites like fudge, not a frozen puddle, and the little twist of malted milk plus espresso makes the chocolate taste downright luxurious.
Why You’ll Love This Recipe
Old-school soda fountain flavor: The malted milk powder adds that toasty, nostalgic depth that makes the cocoa taste rounder and more “classic,” the way the best chocolate shakes used to.
Velvet texture, not icy: I learned that a tiny bit of cornstarch and smart whisking helps the base emulsify, so you get a smooth mouthfeel instead of crunchy ice crystals.
Chocolate turned up to eleven: The instant espresso powder doesn’t make it taste like coffee, it acts like a culinary highlighter for dark chocolate, making the fudgy flavor feel deeper and more intense.
Ingredients and Substitutions

This short list is doing big work, whole milk for creaminess, cocoa plus dark chocolate for depth, and a quick stovetop thickening that sets up that “pudding on a stick” bite.
Ingredients
- 1 cup whole milk, at room temperature
- 2 tablespoons unsweetened cocoa powder, sifted
- 1/3 cup granulated sugar
- 1 tablespoon cornstarch
- 1/8 teaspoon salt
- 1 ounce dark chocolate, chopped
- 1/2 teaspoon vanilla
Ingredient Notes & Substitutions
Dark chocolate: A chopped bar around 60% cacao melts into a silkier finish than standard chips, which often contain stabilizers that can mute flavor. If you love a deeper bite, choose something labeled “bittersweet” and let the cocoa do the talking.
Unsweetened cocoa powder: Sifting matters more than people think, because cocoa likes to clump and those little dry pockets freeze into bitter specks. I look for a cocoa that smells fragrant right out of the tin, that aroma shows up in the final pop.
Whole milk: The fat is part of the magic, it keeps the texture creamy once frozen. If you swap to lower-fat milk, expect a more brittle snap and a colder, icier finish.
Mexican-style variation: Add 1/2 teaspoon of cinnamon and a tiny pinch of cayenne pepper to the warm base, it turns the chocolate into something dramatic and warming without becoming “spicy dessert” territory.
Clean-eating style: Maple syrup can replace the granulated sugar for a gentler sweetness, and a little Greek yogurt can add tang and body. Keep the mixture smooth and fully dissolved before freezing, since liquids can change how quickly it sets.
How to Make homemade fudge popsicles
Mix the base
- Set a medium saucepan over medium heat, then whisk in the whole milk, granulated sugar, unsweetened cocoa powder, cornstarch, and salt until the mixture looks evenly brown with no dry patches hiding at the edges.
- Keep whisking for a full minute, scraping the corners of the pan, because cornstarch loves to settle where you can’t see it and that’s where clumps are born.
Warm and thicken gently
- Heat the mixture until it’s hot but not boiling, you want steam and a glossy surface, not bubbling, so the sugar fully dissolves and the milk stays sweet and clean-tasting.
- Whisk continuously as it thickens, and watch for the moment it turns from “chocolate milk” to “light pudding” that coats the back of a spoon, the cocoa aroma should smell fuller and more chocolate-forward.
Melt in the chocolate and finish
- Add the chopped dark chocolate and stir steadily for 1-2 minutes, until every last piece disappears and the base looks shiny and satin-smooth.
- Take the pan off the heat and stir in the vanilla, the mixture should be thick but still pourable, like warm fudge sauce.
Fill molds and freeze
- Pour the mixture into popsicle molds, tapping them gently to release air bubbles so the pops freeze dense and fudgy instead of airy.
- Insert sticks, keeping enough stick exposed to hold comfortably, then freeze until firm, about 4-6 hours.
Secrets for a Perfect Fudgy Texture

The temperature sweet spot in my kitchen is 170°F, that’s where the cornstarch thickens confidently without pushing the milk too far. That “fully set but not boiling” moment is exactly when starch granules fully hydrate and thicken for a smoother frozen bite.
Milk fat is another quiet hero here, because it rounds out cold flavors and softens texture on your tongue. The science folks explain how it produces a characteristic smooth texture in frozen desserts, which is exactly what we’re chasing.
If you’ve ever unmolded a two-toned pop, darker at the bottom, that’s sedimentation from cocoa or chocolate particles settling. A quick blitz in a blender before pouring helps emulsify everything evenly, so every bite tastes the same from top to tip.
Silicone molds are forgiving and release like a dream, especially if your freezer runs cold. Plastic molds can give you a slightly glossier, smoother-looking exterior, but they sometimes need that warm-water assist to come out clean.
Pro Tips & Troubleshooting
Pro Tips
- Run the mold under warm water for 15-20 seconds, then wiggle gently for a clean release without snapping sticks.
- If you spot any tiny lumps after whisking, strain through a fine-mesh sieve so the base freezes perfectly smooth.
- A blender step before pouring helps emulsify the cocoa and chocolate, which prevents that “layered” look once frozen.
Common Mistakes to Avoid
- Using skim or 1% milk leads to a brittle, icy texture instead of a fudgy bite.
- Letting the mixture boil vigorously can damage texture and turn chocolate grainy, the heat easily ruins the chocolate’s temper and creates graininess.
- Skipping steady whisking invites cornstarch clumps, which show up as chalky bits once frozen.
Serving & Storage

Fun Serving Ideas
For a fancy finish, dip the frozen pops in melted chocolate, then roll them in crushed hazelnuts or a pinch of flaky sea salt. Fresh raspberries on the side keep each bite bright and balanced against all that rich cocoa.
For a spicy-sweet grown-up twist, a few warm drops from this hot honey recipe can be stunning over chocolate. I like it when the pops are just slightly softened, so the drizzle clings instead of cracking off.
If you’re building a dessert table, something spoonable and shareable rounds it out beautifully. A chilled brownie strawberry trifle keeps the chocolate theme going while adding fruit and cream.
Long-Term Storage Tips
These keep their best texture for about 48 hours uncovered, after that the freezer air starts stealing moisture. Wrapping each pop in parchment paper, then sealing in an airtight freezer bag, is my go-to for preventing freezer burn over longer storage.
Keep them toward the back of the freezer where temperature stays steady, because door-shelf swings create those rough, icy edges. If you’re storing a batch for a week or two, label the bag, chocolate disappears fast in a busy freezer.

Homemade Fudge Popsicles
Equipment
- Medium saucepan
- whisk
- Popsicle molds
- Fine-mesh sieve
Ingredients
- 1 cup whole milk, at room temperature
- 2 tablespoons unsweetened cocoa powder, sifted
- 1/3 cup granulated sugar
- 1 tablespoon cornstarch
- 1/8 teaspoon salt
- 1 ounce dark chocolate, chopped
- 1/2 teaspoon vanilla
Instructions
Mix the base
- Set a medium saucepan over medium heat, then whisk in the whole milk, granulated sugar, unsweetened cocoa powder, cornstarch, and salt until the mixture looks evenly brown with no dry patches hiding at the edges.
- Keep whisking for a full minute, scraping the corners of the pan to ensure the cornstarch is fully incorporated and doesn’t settle into clumps.
Warm and thicken gently
- Heat the mixture until it is hot and steaming with a glossy surface, but do not let it come to a boil. This ensures the sugar dissolves completely while maintaining the clean taste of the milk.
- Whisk continuously as the base thickens to approximately 170°F, or until it reaches a light pudding consistency that coats the back of a spoon.
Melt in the chocolate and finish
- Add the chopped dark chocolate to the pan and stir steadily for 1 to 2 minutes until it has completely melted and the base is shiny and smooth.
- Remove the saucepan from the heat and stir in the vanilla extract. The mixture should be thick yet pourable, resembling warm fudge sauce.
Fill molds and freeze
- Pour the chocolate base into popsicle molds, tapping them gently on the counter to release trapped air bubbles for a dense texture.
- Insert the sticks and freeze until the popsicles are firm, which typically takes between 4 and 6 hours.
Notes
Nutrition
Conclusion
Once you taste homemade fudge popsicles with that malted milk and espresso boost, the grocery-store box starts to feel a little sad. The base comes together in minutes, and the texture freezes into something dense, velvety, and unapologetically chocolatey.
On hot afternoons, I love having another “pro-style” frozen treat in rotation, and mochi ice cream scratches that same homemade-dessert itch with a totally different vibe.
Frequently Asked Questions
How do I prevent my fudge pops from becoming icy?
Use whole milk for fat, and cook the base so the cornstarch thickens properly, that combo limits ice crystals. For an extra-creamy hack, a spoonful of blended cottage cheese can add body to frozen snacks without much effort.
What is the best type of milk to use for creamy popsicles?
Whole milk is the best match for this formula, because it freezes softer and creamier than low-fat milk. If you want to go even richer, replacing part of the milk with heavy cream works well, but it will taste more decadent.
Can I substitute the sugar with honey or maple syrup?
Yes, but keep in mind liquid sweeteners change thickness and freezing texture. A good starting point is swapping the 1/3 cup granulated sugar for 1/4 cup honey or 1/4 cup maple syrup, then cook and whisk until the base is smooth and lightly thickened.
Do I really need to cook the mixture first?
Yes, cooking is what activates the cornstarch and helps the cocoa dissolve into a smooth base. Without that gentle heat, the pops tend to freeze chalky, separated, or icy.
How long do they need to freeze before they are ready?
Freeze until firm, about 4-6 hours. If your molds are large or your freezer runs warm, lean closer to 6 hours for a clean unmold.